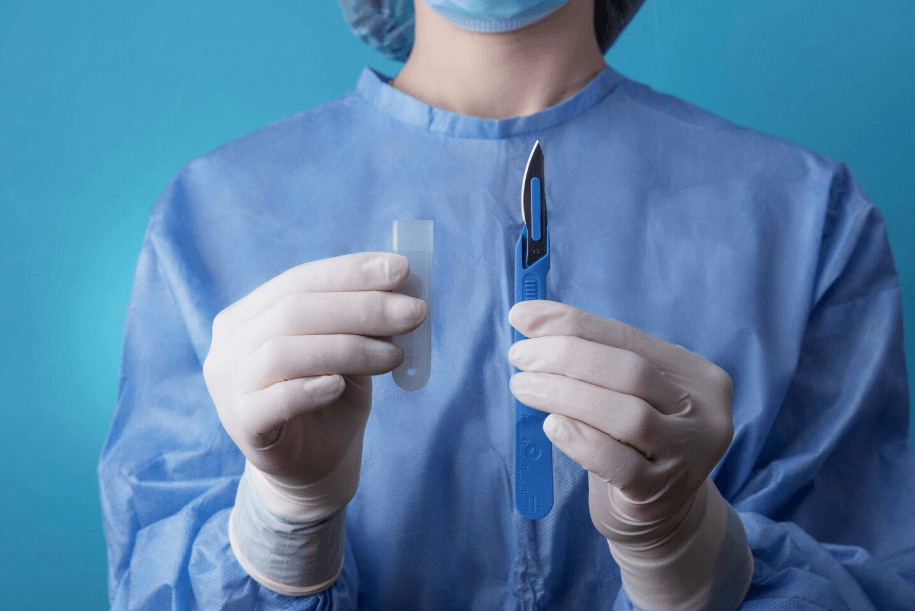
Quick answer: The reliable way to identify a surgical instrument is to read its anatomy rather than memorize appearances. Every ringed instrument shares the same parts, tips, jaws, box lock, shank, ratchet, and ring handles, and the details of each part reveal the instrument's identity and use. A ratchet means it locks closed (a clamp or needle holder); serrated jaws grip tissue; toothed tips grasp tough tissue; smooth tips are atraumatic. Reading these features lets you name an instrument and tell apart look-alikes like Kelly and Rochester forceps.
Identifying surgical instruments by memorizing what each one looks like is slow and error-prone, because so many instruments resemble one another. The professional approach is different: learn the anatomy common to all instruments, then read the specific features of the one in your hand. This turns identification from rote memorization into a repeatable method that works even on instruments you have never seen. This guide teaches that method, then applies it to the instruments you will meet most.
The Anatomy of a Surgical Instrument
Most articulating (hinged, ringed) instruments share the same basic parts. As surgical references describe, the basic parts of an articulating instrument are the tips, jaws, box lock and pin, shank, ratchet, and ring handles. Learn what each part tells you and you can decode almost any instrument.
- Ring handles: where the fingers go. Most ringed instruments use finger rings, though some use a pistol grip or spring-loaded design.
- Ratchet: interlocking, gear-like teeth located just below the ring handles that have multiple positions so the instrument can be locked closed in a particular position. The presence of a ratchet is a major clue: it means the instrument is designed to lock, marking it as a clamp or needle holder rather than scissors.
- Shank: the length of the instrument from handle to working end. The shank determines overall length, with longer shanks used to access tissues within body cavities.
- Box lock and pin: the hinge or joint where the shanks cross. It absorbs stress during use and autoclaving and is a common point of instrument failure.
- Jaws: the working part that contacts tissue. Jaws may be smooth or serrated, and this is one of the most important identifying features.
- Tips: the very ends of the jaws, which may be sharp, rounded, blunt, or toothed depending on purpose.
Read these parts to identify any instrument
- Ratchet present? → it locks (clamp or needle holder)
- Jaws serrated or smooth? → grip vs atraumatic
- Tips toothed, sharp, or blunt? → grasp, cut, or hold gently
- Shank long or short? → deep-cavity vs surface use
- Tips straight or curved? → curved often aids visibility
Reading the Jaws and Tips
The jaws and tips carry the most identifying information. A few features to read:
- Serrations: the ridged teeth on the inner surface of the jaws that help prevent tissue from slipping out of the jaws. The pattern and length of serrations distinguish similar instruments.
- Teeth (toothed vs atraumatic): instruments meant to grasp tissue have jaws designed to be traumatic or atraumatic, with various configurations and combinations of serrations and teeth. Toothed tips grip tough tissue like skin; smooth atraumatic tips protect delicate tissue.
- Tip shape: sharp tips cut, blunt tips dissect or hold, and tips can be straight or curved, with curved tips generally aiding visibility.
- Special jaw finishes: some needle holders have diamond-dusted jaws, a fine diamond layer that hardens the surface and improves grip and durability.
Applying the Method: Identifying Common Instruments
Hemostats and clamps
Ring (locking) forceps are hinged, look like ring scissors, and have a ratchet for clamping; when used to control blood flow they are called hemostats. Reading the jaws distinguishes the look-alikes: Kelly hemostats and Rochester forceps appear similar, but Kelly hemostats have shorter serrations. This is the method in action: when two instruments look identical, the serration pattern, jaw length, or tip detail tells them apart.
Needle holders
Needle holders have a ratchet to lock onto the needle and textured jaws to prevent the needle slipping. The jaw finish signals the use: serrated tips hold larger needles, while smooth tips are designed for the smallest needles; smooth-jaw holders like the Halsey or Webster pattern handle very tiny suturing needles. A needle holder can resemble a hemostat, but its shorter, stouter jaws built to grip a needle give it away.
Scissors
Scissors share the ring-handle-and-box-lock structure but have blades instead of gripping jaws, and typically no ratchet. Read the blades: heavy blades for thick tissue (Mayo), delicate tips for fine dissection (Metzenbaum), sharp for cutting, blunt for safety.
Forceps (thumb/tissue forceps)
Non-ringed forceps work by squeezing two arms together. Read the tip: toothed (rat-tooth, for skin and tough tissue) versus smooth (for delicate tissue). The tip pattern is the entire identification.
A Quick Identification Workflow
When you pick up an unknown instrument, run this sequence:
- Ring handles or squeeze arms? Ringed = scissors, clamp, or needle holder; squeeze arms = thumb forceps.
- Ratchet present? Yes = it locks, so it is a clamp/hemostat or needle holder, not scissors.
- Blades or jaws? Blades = scissors; gripping jaws = clamp or holder.
- Read the jaw/tip detail: serrations, teeth, smoothness, and tip shape narrow it to the specific named instrument.
- Note the length: long shank suggests deep-cavity use; short suggests surface work.
Within a few steps this places almost any instrument, and the final jaw or tip detail usually names it.
A Note on Materials and Inspection
Identification also touches quality. Most surgical instruments are stainless steel, commonly the 300 series (austenitic) or 400 series (martensitic), with the grade affecting hardness and corrosion resistance. When inspecting an instrument, check the same parts you use to identify it: tips present and aligned, jaws and serrations clean and intact, box lock free of cracks, and a smooth open-and-close action. The anatomy that tells you what an instrument is also tells you whether it is fit for use.
Surgical instrument identification stops being intimidating once you stop trying to memorize hundreds of appearances and start reading the handful of parts every instrument shares. Tips, jaws, box lock, ratchet, and handles are a language; learn to read them and you can identify, distinguish, and even quality-check almost any instrument you encounter.
Frequently Asked Questions
How do you identify surgical instruments?
The reliable method is to read the instrument's anatomy rather than memorize appearances. Check whether it has ring handles or squeeze arms, whether it has a ratchet (which means it locks), whether it has blades or gripping jaws, and the detail of its jaws and tips (serrations, teeth, smoothness, shape). These features narrow any instrument to its category and then to its specific name.
What are the parts of a surgical instrument?
Most articulating instruments share the same parts: ring handles (where fingers go), the ratchet (gear-like teeth that lock it closed), the shank (length from handle to tips), the box lock and pin (the hinge), the jaws (the working surface that contacts tissue), and the tips (the ends of the jaws). Reading each part reveals the instrument's identity and function.
What does a ratchet on a surgical instrument indicate?
A ratchet is a set of interlocking, gear-like teeth just below the ring handles that lets the instrument lock closed in multiple positions. Its presence indicates the instrument is designed to hold a clamp or grip, marking it as a hemostat, clamp, or needle holder rather than scissors, which typically have no ratchet. It is one of the fastest identifying clues.
How do you tell similar surgical instruments apart?
By reading the fine jaw and tip details. For example, Kelly hemostats and Rochester forceps look very similar, but Kelly hemostats have shorter serrations. Similarly, toothed versus smooth tips, serration length and pattern, jaw shape, and instrument length distinguish look-alikes. When two instruments appear identical, the serration or tip detail is almost always the deciding feature.
What is the difference between a needle holder and a hemostat?
Both are ringed instruments with a ratchet, so they look similar, but the jaws differ. Needle holders have shorter, stouter jaws, often with a crosshatched or diamond-dusted surface, built to grip a suturing needle without letting it rotate. Hemostats have longer, finely serrated jaws designed to clamp vessels. Reading the jaw shape and texture distinguishes them.